
Manna from Devon’s Wood Fired Pizza Masterclass
There’s a lot of questions and opinions about how to make the perfect wood fired pizza so we’ve decided to write it all down for you. There’s quite a lot of info as there’s quite a lot to do but like many skills; once you’ve practised it enough, it will become second nature.
Here it is – our step by step wood fired pizza masterclass – this is how we do it here at the cooking school. It’s not the only way but it’s our way and it works!! If you’ve got any questions, just let us know.
You can also watch the pizza making video on our youtube channel and use it in conjunction with this blog.
- Dough
- We use Italian 00 flour. It gives a lovely puffed crust and is easy to get hold of in shops. Ours comes from Shipton Mill’s Flour Direct. You don’t need to get it in 25kg sacks; it comes in 1kg bags too!
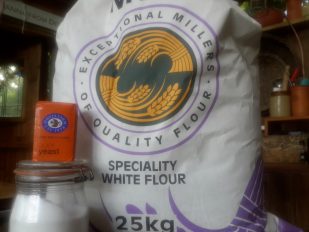
We use Shipton Mill flour, it’s the best
- Make your dough in plenty of time. It needs to ripen and strengthen so you get the best shaped and size pizzas that don’t spring back.
Make your dough in plenty of time
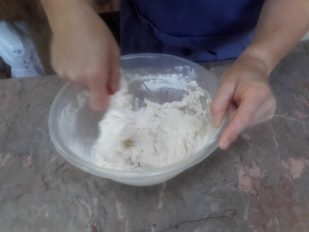
- The dough will be wet and sticky at first. Don’t panic; a wet dough gives a better finished result – don’t be tempted to add more flour or the dough will be too elastic and difficult to shape.
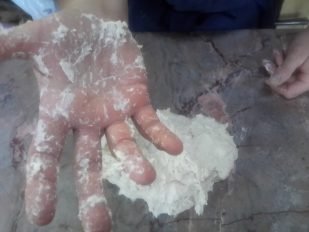
Don’t panic when your dough is sticky
- Our recipe for 10 x 10-12” pizzas is
- 1kg 00 flour,
- 665g/ml cool water(20 – 25 degrees if you want to be precise)
- 20g fine seasalt
- 10g dried yeast.
Basically 100g flour per pizza.
- You can weigh water – it’s easier than a measuring jug. 1ml weighs 1g so 1litre weighs 1kg.
- Mix the 4 ingredients to make a dough and knead it for about 10-15 minutes until it’s springy and smooth. Don’t worry if you get messy hands at first, the dough will become dryer as you work it.
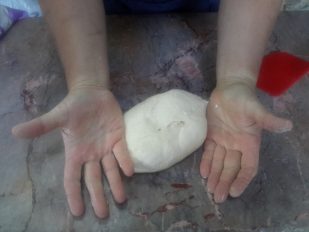
The dough will be smooth and not sticky after kneading
- Put it in a big plastic bowl and cover with a big plastic bag; this stops a crust forming on the dough.

Leave the dough to rise covered with a plastic bag
- Leave it for 4 hours or so to rise – room temperature is fine. When it’s ready it will be well risen and puffy; you’ll be able to put a floured finger right into the dough and the hole you make won’t close up once you take your finger out.
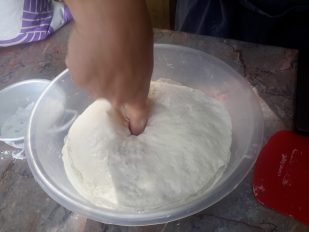
The dough is ready when you can stick a floury finger in it and it doesn’t fall back
- Everything about dough balls
- Divide the dough into 165g pieces.
- On a clean work surface (ie no flour) take one of the pieces of dough in one hand and roll it loosely at first on one spot with increasing pressure from your palm to make a sphere with your fingers hooked over to make a claw but not holding the dough.
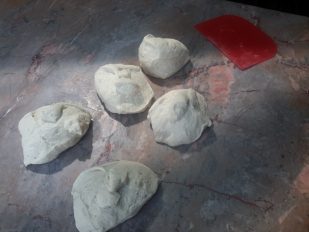
Cut into 165 g pieces
Shape into balls on a flour free surface before putting them on a floured board so they don’t stick
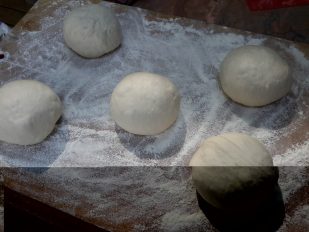
- Liberally dust a wooden board or a plastic tray with flour and put the dough balls on this well spaced apart. The flour will stop them sticking.
- Cover the dough balls with oiled clingfilm – this can get a bit messy but again it stops a crust forming on the dough balls and stops the clingfilm sticking to them when you want to take it off.
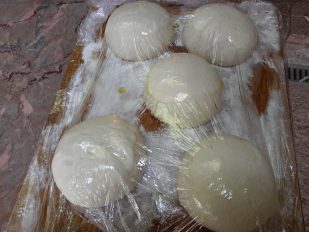
Oil the clingfilm, messy but crucial
- Leave the dough balls to relax for an hour. They’ll rise up again and get puffy. This is really important – if your dough balls aren’t relaxed then your pizza bases are going to spring back and you’ll have to pretend you wanted mini pizzas after all…..
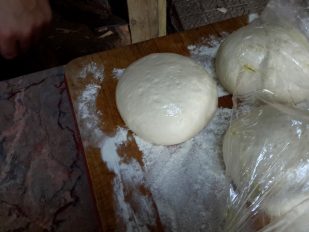
Nicely relaxed and risen
- Getting the fire ready.
- The fire wants to be burning brightly with a good lot of flames coming over the top of the oven to grill the pizzas.
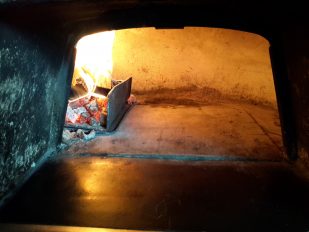
Lots of heat and flames in the oven
- The oven wants to be flooded with energy/heat, and you shouldn’t be able to get your hands in the oven – see our post about temperatures here.
- So make sure you get the fire burning in good time to heat up your oven.
- If you are using a laser thermometer the base of the oven floor should read 350C.
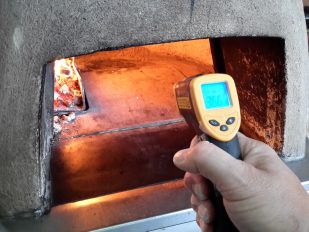
Take the temperature
- Have plenty of small bits of wood ready to feed the fire and keep the flames burning.
- Use a dirty peel to move the fire to the side or the back of the oven.
- Use a fire guard to keep the coals and ash out of the pizza. This also makes the flames go up and over the top of the oven. If you haven’t got one you can make one out of an old baking sheet.
- Move any ash away from the oven floor with a blow pipe or brush and then wipe the oven floor lightly with a damp cloth – we tie an old tea towel round a long handled window cleaner and use that.
- Shaping the pizzas.
- Put some flour on your work surface. Put one of the dough balls on it – nice and relaxed now – and cover it with plenty of flour.
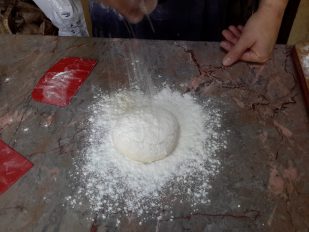
Put the dough ball on flour and cover it with plenty too
- Move your fingertips up and down over the internal surface of the dough, leaving a rim around the edge, until the dough ball flattens out and spreads to just less than the spread of your hand. This is called dibbling. Try not to stretch it to make it dough; it’s just the up and down movements that you need to do. If you have long nails, be careful they don’t cut into the dough.
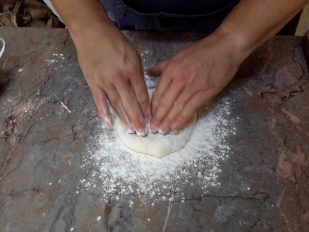
Dribbling your dough ball til it’s as wide as your hand span
- Pick up the dough and hang it off the edge of your left hand. Hold the thumb into the rest of the palm so it doesn’t make a hole in the dough.
- Bring your right hand, again with the thumb held close to the palm, in to the base of the dough circle where it is hanging down.
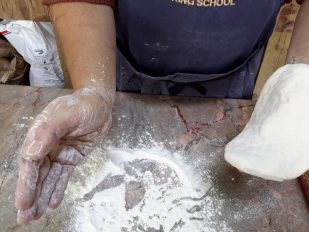
Hang the dough off the side of your hand
- Move your left hand up your right arm and take it away from the dough circle so the dough is now hanging off your right hand. Again – check out the video and practise.
- This called the flop and will make the dough grow evenly into a disc.
- When the dough is about 7-8” wide you can now stretch it up your fore arms to make it grow the last few inches. This is called the stretch.
- So that’s the famous dibble, flop and stretch technique!
- Shake off any excess flour and put the pizza on to a metal peel. We don’t put any more flour on the peel or any semolina; there should be enough on the base already. If you add extra it just ends up on the oven floor scorched and burnt; then that will build up over the session and blacken all the pizzas.
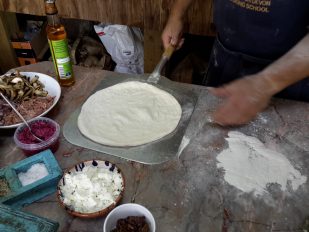
No more flour when you put the pizza on the peel
- Topping your pizza
- Make sure your toppings are prepped and ready to go – thinly sliced veggies, small pieces of meat, ripped or grated mozzarella. We toss our onions and mushrooms in oil so they don’t scorch in the heat.
- Make sure you know what you want to use before you put the pizza on the peel. Indecision and generally faffing around might mean the pizza sticks to the peel and won’t come off when you need it to.
- If you are putting on any oil – garlic or chilli or just olive oil; make sure you don’t dribble any on the peel as that will make it stick.
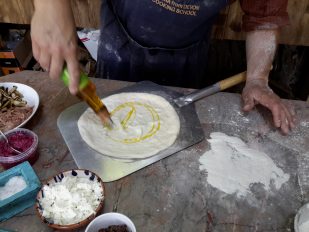
Adding chilli oil
- Use a minimum amount of tomato sauce or passata and use the back of a metal spoon to spread it around leaving a margin of a about 2-3cm around the edges. Try not to drop any on the peel – again it might make it all stick.
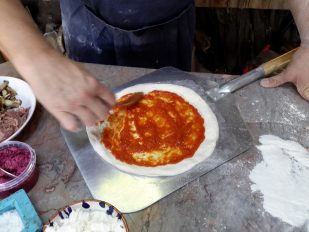
Leave a margin between the tomato sauce and the edge of the pizza
- When the pizza is topped, just make sure it is mobile on the peel by moving the peel around in a circle horizontally.
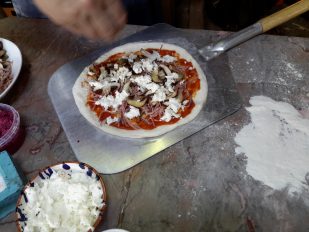
Not too much topping
- If the pizza is sticking just lift it up where the sticky bit is with a dough scraper and ease it off the peel. If this doesn’t work, ease the pizza up again and sprinkle some flour underneath.
- Cooking the pizza.
- Make sure the oven is still hot enough with flames burning. Add some sticks of wood if you need to.
- Decide where the pizza is going to end up in the oven.
- Put the front edge of the peel on the base of the oven where you’ve decided it will go and then gently shuffle the pizza off the peel, bringing the peel back towards you at an angle of about 30 degrees.
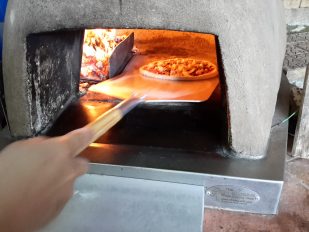
Place your pizza in the oven and carefully draw out the peel
- Don’t madly throw the pizza into the oven as it will just land in the fire.
- Keep an eye on the edge of the pizza closest to the fire. It will start rising up and after about 20 seconds, it will give out a puff of steam. Watch for that as it’s a good sign the pizza has set and it is safe to start moving it. If you do it before the base has set and is still soft, you’ll rip the base.
The crust will puff up and let out some steam. Don’t turn it until then
- Put a metal peel underneath the pizza and gently bring it towards you and turn it around on the peel so the side that is more cooked is now away from the flames.
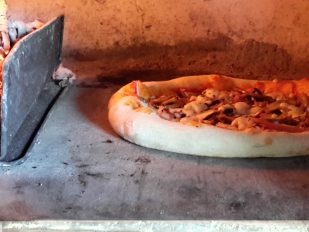
- Put the pizza back on the base of the oven floor and wait for it to be finished. You want the top to be golden brown and nicely bubbling and the crust to be puffed up and firm. Ideally this will take 90-120 seconds.
- Use a peel to take the pizza out of the oven and put it on a board.
- Use a pizza wheel or a large knife to cut the pizza. If you are using a knife, use a guillotining action so you don’t drag the toppings off which you’ll do if you saw it.
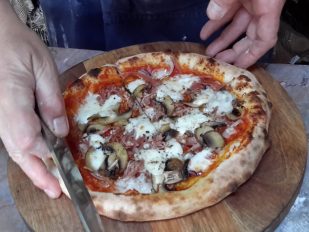
Nicely baked pizza with puffed crust and grilled cheese
If the worst happens and the pizza splits on the oven floor, take it out, throw it away and use a stiff metal brush to clean the oven floor. If that doesn’t work, rake the fire over the base of the oven for a couple of minutes to burn it all off and start all over again by pushing the coals back to the edges.
Well done – that’s your wood fired pizza. Keep making them until you can shape the dough balls, top them, manage the fire, move them around, cook more than one at the same time….Then you’re ready for your first pizza party. Cheers!!