
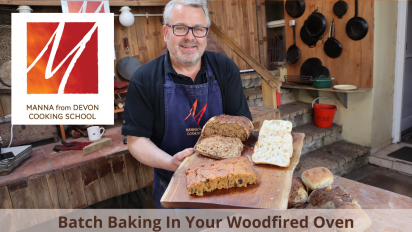
Batch Baking in Your Woodfired Oven
Batch baking is basically cooking a lot of food in the falling heat of your woodfired oven. It is most easily done in a refractory oven as the fire is taken out of the oven once the mass is heated up and we use this stored heat to bake the variety of fabulous things you can see in the video – flatbreads, buns, loaves, cake and stock. It’s using the refractory oven as it would have been done originally as a village baking oven – just on a rather smaller scale!
Literally in a village baking oven!
If you imagine the oven with its stored heat is a battery and the buns, loaves, cakes, braises et al are taking energy out of the oven, it’s easy to understand what’s going on. Physics would have been much more interesting at school had they explained it like this!
This Woodfired Workshop isn’t really about the recipes David’s making but what kind of thing is going in at higher temperatures through to lower temperatures and how to prepare the oven for this kind of cooking. Ther are some clickthroughs to recipes below but think of the kind of thing that cooks at high, medium and lower temperatures, then think what kinds of those things you would like to bake and then off you go.
Do check out the video here and let us know if you have any comments or questions – we always love hearing from you.
Getting the oven ready
We are using our Bushman Santorini oven, 60cm in internal diameter, which once fully loaded will retain its heat for a good 12-15 hours. Our ovens are inside the cooking school and used regularly so we aren’t driving off any moisture that may have got in there from the weather or from it not being used, so your oven may behave differently to ours. Obviously only you can gauge how it’s likely to perform and by using it for this kind of baking so keeping a notebook to record what you do and the results you get may well prove beneficial. We know we think we will remember what we’ve done but in reality that’s not quite how it works…..
- So our oven was heated up for 2 hours to get the mass of the oven really saturated with heat.
- The embers were then pushed to the sides so that the oven floor was not so hot it would burn our first things going into the oven.
- David took out the embers with the dirty peel and put it into the old metal bucket which was then put outside to prevent any carbon monoxide lingering around and potentially poisoning us. Don’t wear open-toed sandals or flipflops etc to do this and make sure you have a bucket of water or fire extinguisher handy if you are liable to drop embers or the wind takes some off the peel.
- The floor was blown clean with our blowpipe and the door was shut to stabilise the oven. Everything was left for 15-20 minutes to get rid of any hot spots/cool spots etc as the heat moves around the oven into the cooler spots.
- To get the air temperature you want to take the temperature of the wall at the right, at the left and at the back of the oven about 10cm up the wall and then take the temperature on the floor. Add all these up and then take off 10% and this will give you a guide to the air temperature so you know what to put in when. This may sound a bit daunting and like you’re back in maths class but use a calculator and it’s a doddle! You can also back this up with the tried and trusted Mississippi method – or the Bovey Tracy Method as we call it in Devon!
- The door – remember to take it off and put it back on quickly. If you faff around with the door off you’re going to lose that precious heat and there’s no fire in there to reheat remember. Also if your oven is a bit too hot for say the cake, then remember to keep it ajar slightly so that some of the heat escapes – micro adjusting for your oven as is needed. A handy little bit of wood is very useful to keep it ajar.
- That’s it – ready to bake!
Getting ready to bake
So the batch baking is really all about the oven; don’t start making dough, browning meat etc when you’re concentrating on what’s happening in and coming out of your oven. Do all your prep the night before – make your dough and put it in the fridge, bring it out first thing and shape it and it should be ready when your oven is ready; do all your chopping, prepping and browning of braises etc in advance so your ready to just use the falling heat of the oven. OK you can probably prep a couple of cakes while the large loaves are baking; we’ll give you that!
Baking at high temperatures
At high temperatures of around 300C, we put in a flatbread of some kind just to take out some of the heat from the floor –
- In the video David made a flatbread with a random topping of things found in the fridge – onion, chilli, parsley, garlic oil and a bit of cheddar (delicious – do give it a try!)
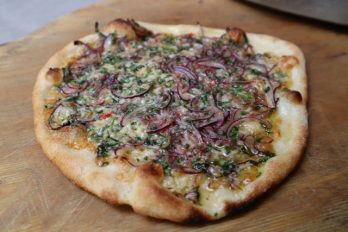
A delicious mid-baking snack
Then the crusty buns go in or you could put in baguettes, foccaccia or ciabatta.
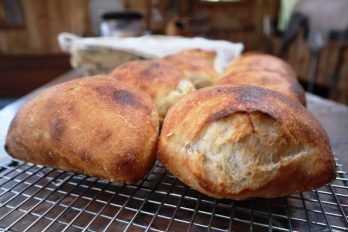
Nice buns!
Medium temperature baking
Some of the energy has now been taken out of the oven but it is still pumping out heat. The loaves go in at about 270C but you’ll have noticed David put 4 of them in the oven. Think of that battery – if he put just 1 loaf in to bake then we can pretty much assume it would have come out, well, black, By putting 4 of them in there, they are all sucking up heat from the oven, the heat is dropping more quickly and it’s a safer environment for the loaves – safety in numbers.
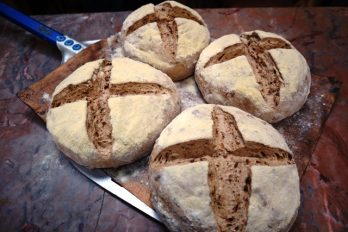
Ready for the oven
David baked sourdoughs in there but that’s whole new lesson – any big loaves will work fine! 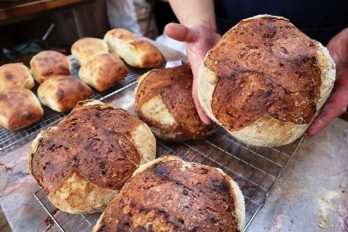
Lower temperature baking
The oven is now around 200C. Now we’re ready for our carrot cake, maybe some softer rolls, or a pie. Not forgetting your Christmas cake of course!
Very low temperature baking
The traditional braises go in now at around 180C – perfect for stock, Jacob’s Ladder, Oxtail or Osso Buco. Also shoulder of lamb or pork, beef or pork cheeks, Bolognese sauce or chilli con carne
You need to remember though to get these made ready to the putting it in the oven stage in advance or have someone prepping them for you in the house kitchen; there won’t be enough heat in the oven to do the initial prep and browning, just enough to do the slow braising stage.
Even lower temperature baking
So once your braises are cooked – maybe 3, 6 or 9 hours later, you’d be forgiven for thinking there is nothing left in the oven to give. But depending on the oven, you could do a few more things – try it and see. Even after an overnight braise, we have successfully –
- made meringues
- dried tomatoes
- made granola
- dried herbs
Phew – hope you’ve got space in your freezer for all that, or hungry neighbours!
We hope that’s give you a whistle stop tour of batch baking. Remember only you will know how your oven works and you will only get that from experience so do give it a try and if you have any questions, just let us know.
We relish this kind of cooking – the refractory ovens really come into their own and traditionally that’s what the village ovens would have been used for. That connection with generations of former cooks and bakers – just one of the things we love about cooking with your woodfired oven.
Happy cooking!
David and Holly
Enjoy your baking!