
Lighting your Woodfired Oven
Lighting your woodfired oven and getting it up to temperature is one of the most crucial skills to master with your woodfired cooking. Some of our students on our courses admit to finding this challenging. We thought we’d make this week’s Woodfired Weekly more of a tutorial and show you exactly what we do to get things going.

Lighting your Woodfired Oven #1
Make sure you have a good supply of very dry hardwood. We use kiln dried birch that we get by the pallet load and that will keep us going for a couple of months. Store it well, stacked neatly with good air circulation and under cover so it doesn’t get rained on. Your wood definitely needs to be below 20% moisture. If not it will smoke a lot. You’ll then spend a lot of time driving off the moisture from your wood rather than heating your oven, your oven won’t get to temperature and you’ll get annoyed. Really – just get some kiln dried wood. It makes everything much easier!!

Nicely stacked wood
Lighting your Woodfired Oven #2
Get a good axe and keep it nicely sharpened. You’ll also need a chopping block to do your chopping on – easier than doing it on the floor. We use a piece of tree trunk that was chopped down in the garden a few years ago. It’s about 40cm high and 60cm in diameter. Eventually it will split up itself but all going well so far.
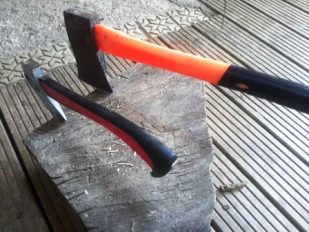
Some of our axes on a chopping block
Lighting your Woodfired Oven #3
Have a session of splitting a load of logs down into kindling about 2-3cm wide before you start cooking and then you’ll have them to hand during cooking.
Do be careful when you’re splitting the logs. It’s all too easy to get distracted and then spend a couple of hours waiting in the accident department for them to sort you out. This is written from experience when David said he was off to chop some logs and Holly said don’t chop your finger off. Ten minutes later, David came in with a teatowel round his hand and asked to be taken to hospital. Fortunately only a glancing blow but he’s still got the scar on the side of his left index finger over 20 years later…..
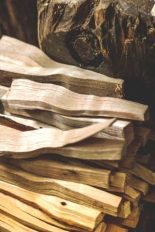
Satisfyingly split kindling
Lighting your Woodfired Oven #4
Make a jenga stack of wood – 2 on the bottom about 8cm apart, 2 placed on top at right angles – continue this until you get a stack about 4 or 5 layers high. Put the jenga stack in your oven and put a fire lighter underneath the stack. We use eco lighters made of wood shavings and candle wax. They work every time and smell nice – no chemical odours!
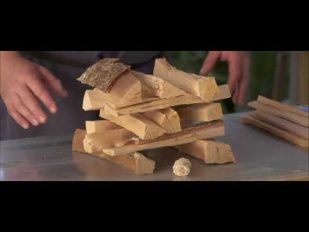
A neat jenga stack
Lighting your Woodfired Oven #5
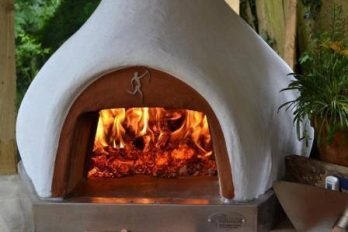
The jenga stack needs to be at the front of the oven whatever kind of oven you have. This means there is a plentiful supply of oxygen to the fire and it will get going quickly. If you push the stack too far into the oven before the fire has really started, the smoke produced will smother any flames. This makes it difficult for the fire to really get going.
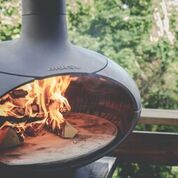
Blazing away in the Morso Forno
Lighting your Woodfired Oven #6
Once the fire is going and burning well, push it to the centre of the oven with a peel. This lets the floor of the oven really heat up.
Once the fire is going, push it to the back of the oven
Different ovens will take different times to really heat up so do watch this week’s Woodfired Weekly to see David working with the 3 different kinds of ovens we use here at the cooking school. Your oven will probably fall into one of these types –
Lighting your Woodfired Oven #7
Once your oven is well heated, start cooking! Depending on the type of cooking and the type of oven, you may need to keep feeding the fire during your cooking session. We find the Bushman ovens once heated up will cook for a long time with no additional wood being added. If we want to grill things though, we have a handy stash of even smaller bits of kindling – about 1cm wide – to add to the embers and create flames to grill the food quickly and at high heat.
Firing up the Bushman Woodfired Oven
The Morso Forno doesn’t have any insulation so that works differently; we keep the embers going and the fire fed throughout the cooking session otherwise it loses heat quickly.
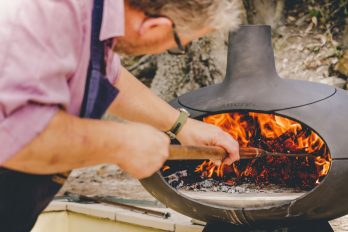
Pushing the fire into the Morso Forno
The Alfa is inbetween the other 2 – it heats up quickly with not much fuel and will hold some heat but still needs a regular feed.
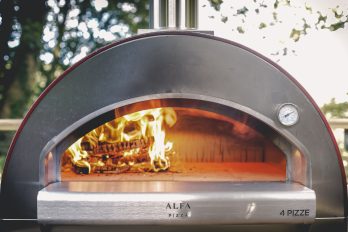
Heating up the Alfa
Lighting your Woodfired Oven #8
Once you’ve finished cooking and your oven has cooled down, take out any ashes and put them in a metal bucket. It’s best to clear the oven before starting cooking again. Otherwise any ashes left inside will interfere with the airflow of the oven and make it more difficult to get the fire going.
We hope that’s helped with any firelighting problems and oven heating challenges. If you have any queries, do let us know.
Back next week with another Woodfired Weekly, this time another fab recipe for you to try
Catch up soon.
David and Holly

See you next time