
Using a Dutch Oven in your Woodfired Oven
Using a Dutch Oven in your Woodfired Oven is a great way to get stability for baking especially if your oven doesn’t have any or much insulation. We’re using this in the Morso Forno – a cast iron oven with no insulation.
Here are the notes from this week’s #woodfiredweekly and the video is on our youtube channel here.
A Dutch oven is basically any cooking pot with a tight fitting lid ideally cast iron which will absorb and retain a lot of heat and create a stable environment for baking your bread.
We’ve found if you use one without a knob on the top, you can turn it upside down which makes it easier to get the dough in to and the finished bread out of.
If you haven’t got a pot with a flat lid, cut a piece of silicon to the diameter of the base of the pot, cutting 2 wings or handles on the sides, and use this to lift the dough into the bottom of the pot. Saves burning your hands and you can reuse it time and again.
Heat the Dutch oven in the woodfired oven first to make sure it is fully heated and then bake the dough in the pot with the lid on for the first 30 minutes before finishing it with the lid off.
In the Morso forno, we keep a fire burning during the cooking, to keep the temperature up while the bread is in the Dutch oven.
If your oven is around 250C, that’s pretty much perfect for large bread loaves.
Here is the recipe we used –
600g strong white flour
400g wholemeal flour
20g salt
10g dried yeast
650ml water
1. Mix everything together and knead on a clean surface (no added flour) for 10 minutes until smooth and springy.
2. Put the dough in a large bowl and cover (we use a large plastic bag or a bin bag).
3.Leave to rise for 2 hours and then put the covered bowl in the fridge overnight. Take out of the fridge and bring the dough to room temperature.
4. Shape the dough into a circular loaf and leave to prove for 30 minutes covered. We leave ours on the table and invert a large plastic bowl over the top.
5. Put the Dutch oven in the woodfired oven to heat through.
6. When the Dutch oven is heated through, take it out of the oven and take the lid off. Put the dough on your silicon cut-out and slash the top with a sharp knife. Lift the silicon up by the wings and place this and the dough in the bottom of the Dutch oven.
7. Put the lid on the Dutch oven and put it back in the woodfired oven. Put the door on the oven and keep the fire fed with small bits of wood.
8. Take the lid off the oven once you bread is nearly cooked – this will dry out the crust.
9. Once the internal temperature is at 95C, take the bread out of both ovens and leave to cool down on a wire rack.
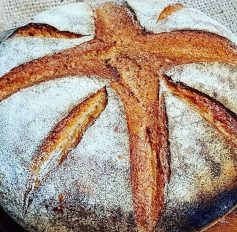
The finished loaf!
Lots more bread making opportunities here at the cooking school – do check out our classes here.